Forum Replies Created
-
AuthorPosts
-
it’s not really that important, but something along that would be a good option

I’m just using desktop – macos
to reproduce I just made a default letterbox app. when the mouse entered/moved in the window, you get the SDL_ notifications.
just been testing it on the latest release.
if you have a problem with textureGL just change any references to Texture (and remove the import from Rameses.monkey2)
Marks new code will work fine
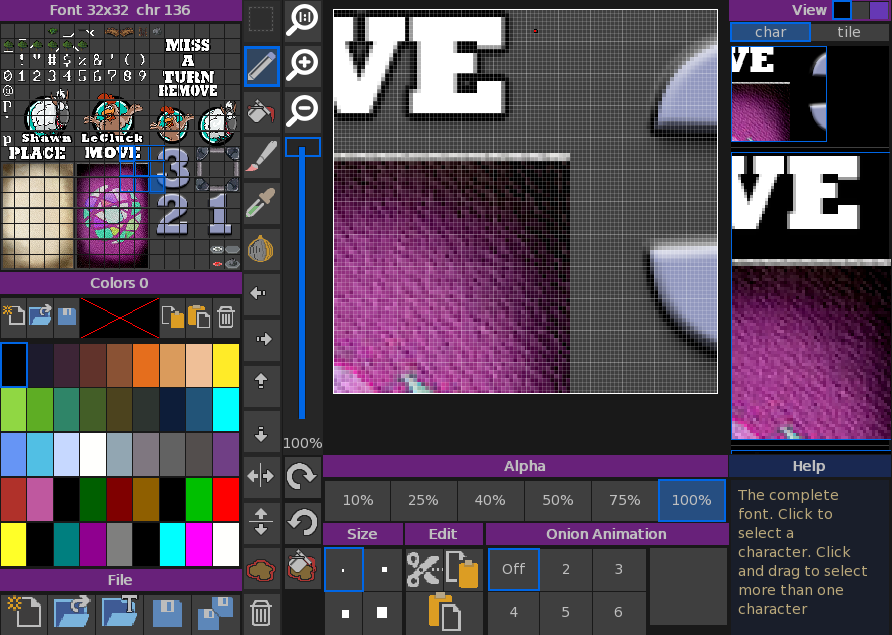
yep. the tools I used are these:
fontsprite to create 2d graphics (you can see version 2 of the font being used, with darker graphics for the cards):
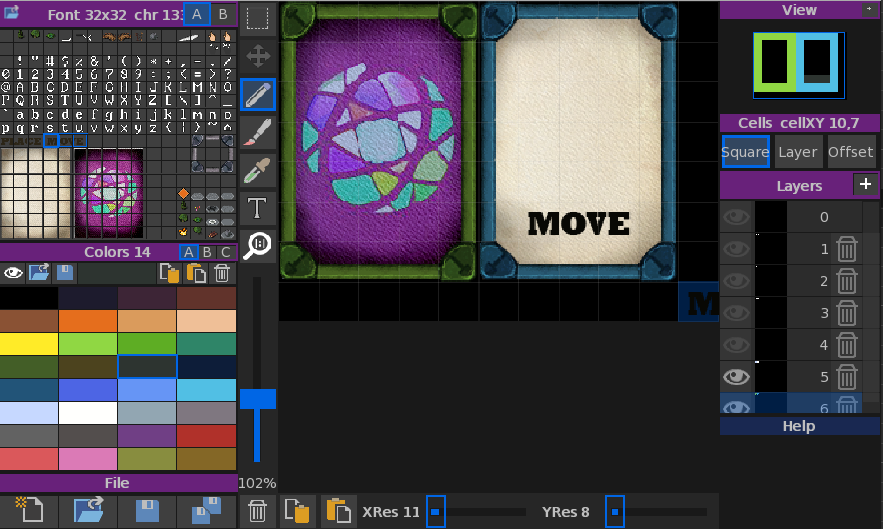
and then fontmap to create the cards (showing version 1 of the font). You can see how the grey font is being used to create both the green and blue edges for the cards. it also shows that most of the layers are off.
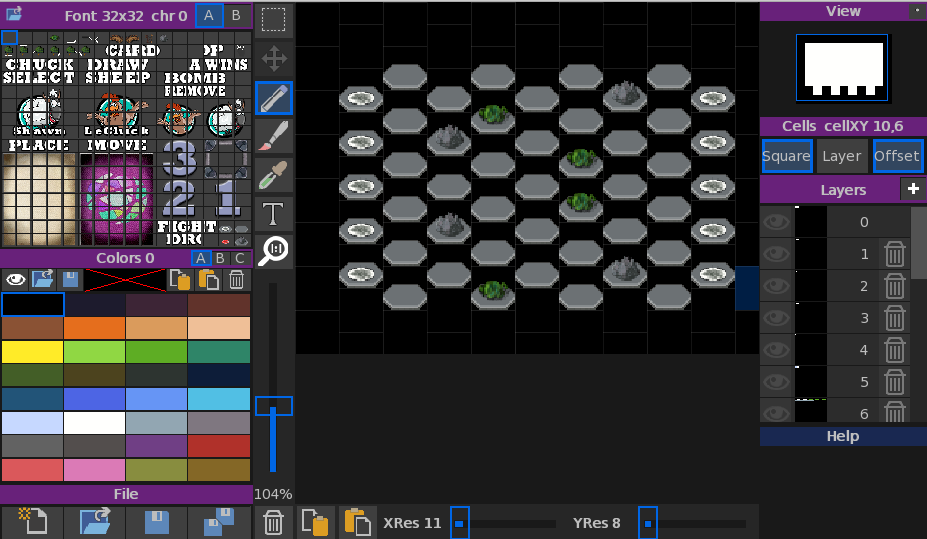
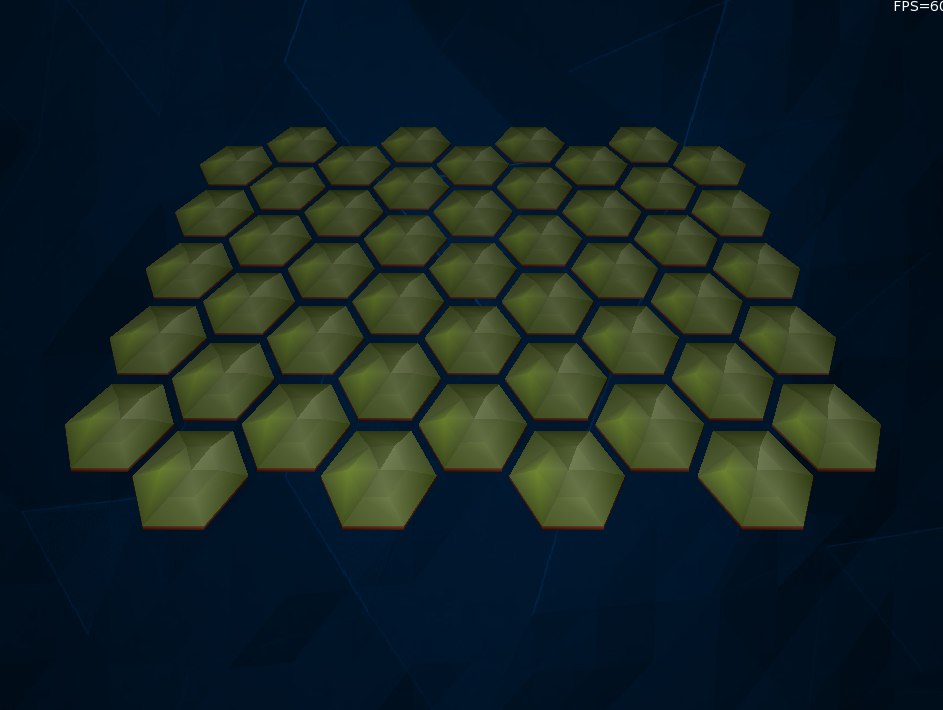
and the maps (with the final version of the font). you can also see that the map display is offset allowing me to quickly work on hex based maps)
I also used a bit of photoshop to do the other graphics.
All the tools are monkey2. But NOT MojoX. I wrote a custom GUI system that allows much better and simpler UI design.
coming on to the GUI of Miralon, I rewrote the above custom gui for game use. it’s a very small system that allows for fast prototyping:
You can see it here with the grid showing and 6 controls. they can use standard text, bitmaps, or graphics. and can be simply subclassed to write other handlers for any purpose. In this case I added the ability to use 3 images for a button: Off, over and top (the top text)
Here’s a snippet of code direct from miralon showing how I create a button:
Monkey1234567891011121314_button2 = New UXImageButton3( "Begin", _imageButton2, _imageButton1, _imageButton3 )_button2.SetGridLayout( 18, 16, 5, 2 )_button2.ImageColor = Color.Orange_button2.TextBold = True_button2.TextColor = Color.Black_button2.MouseEnter = Lambda()MouseEnter()End_button2.Clicked = Lambda()MouseClicked()OKClicked()EndAddControl( _button2 )You can see there is still code to do with Text that I should remove as its not being used, but it show how the code was quickly taken from another project and reused
The MouseEnter and MouseClicked signal back to the main program that it needs a sound. so when you hover a sound plays and when you click another sound plays
I’de be very interested in any suggestions to do with AI?
And the final one for the day adding some cross braces along the lines. Again the map has not changed, just added a single model to the drawing:
taking the above a single step further by adding some more ‘stuff’ to the wall and correcting the heights:
and maybe boost the light a bit:
there are no textures and just a single light. you can see it’s all the same map as was being used before…
replacing the blank walls with some test geometry
although there are height errors, you can see that we don’t need to test for the geometry, just the underlying map
as proof of working, it is not too bad. I need to add heights to things now
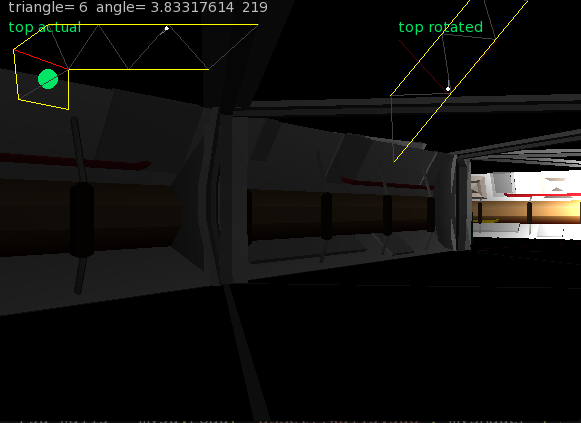
ooh, solved the stuttering with sliding collision and some interesting math.
for any line, it has a normalised vector (all calculated automatically when you add a line) and also an angle (of direction)
when you collide with a line, you can compare your angle of direction with the lines angle of direction. if you add 90 (degrees) you should be parallel to the line
using this you get a – if you are facing towards the core vertex of the line or a + if you are facing away. you use this to modify the position – simples….
and heres the code:
Monkey123456789101112131415Local hitAngle:float = trueAngle - PIHALFhitAngle = -(hitAngle - line.angle)If hitAngle > PI Then hitAngle = hitAngle-PI2'if _debugTrip Then'Print "angle= "+trueAngle+" line= "+line.angle+" hit= "+hitAngle'_debugTrip = false'End IfIf hitAngle < 0 Thenpx = opx + line.normalXpy = opy + line.normalYElse If hitAngle > 0 Thenpx = opx - line.normalXpy = opy - line.normalYEnd Ifwith the debug code as well
px, py is the position you are checking
ops,opy is the old position
Using 3d as the display was always my intention. but I take your point…
I am using the original doom concepts though.
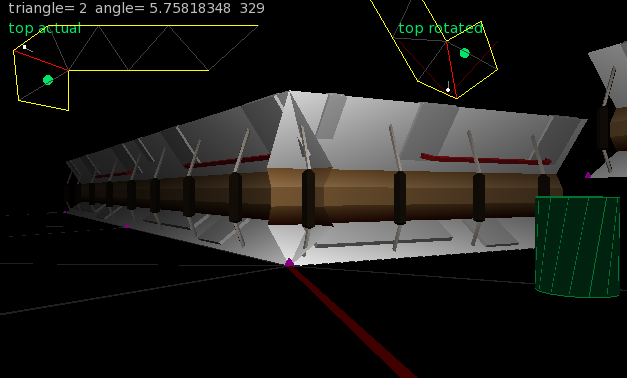
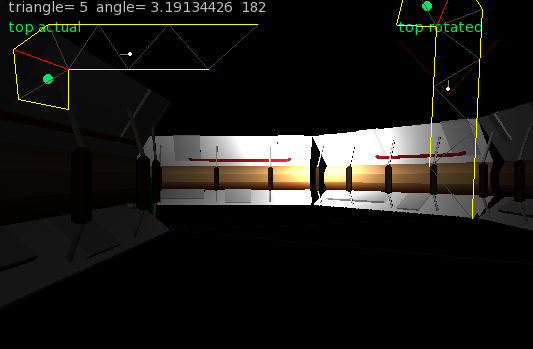
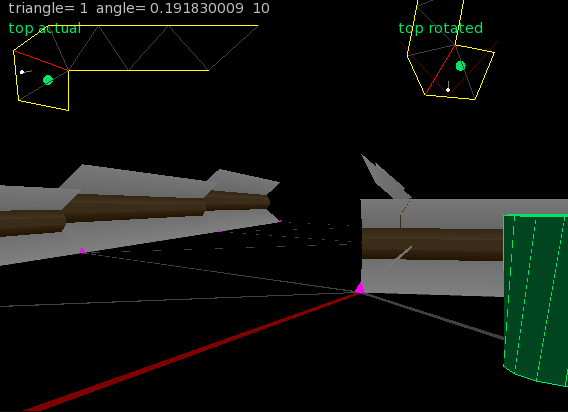
Using a few custom models I can now view a basic framework:

You can see it’s the same map with the lines, etc. I’m working on sliding collision as it currently stutters, so I am looking into using some vectors and other weird stuff.
But the essence of it is operational
LOL. yep I tied to argue that point, but the Jam runner stuck to the 4 color palette.
got 49 out of 129 btw
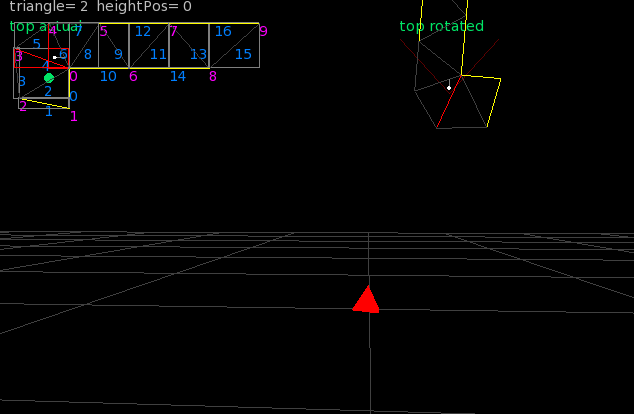
Moved direct into 3d. so I’ve now got a proper openGL 3d view, with the 2d map being added so I can see whats going on.
The red diamond, is just a marker denoting 1 in the X axis, with the grid being at .5 spaces
small steps this stage. but looking positive
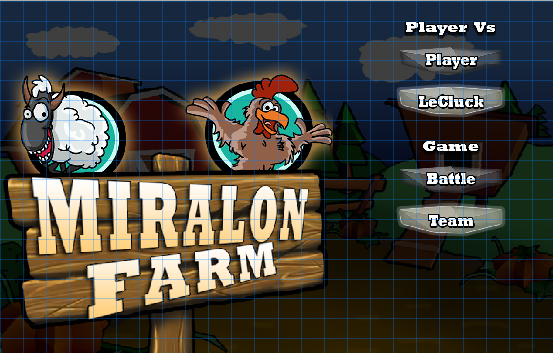
the simple answer is TOOLS! Let me expand on that using Maralon farm
This is the first dev image:
It’s a custom openGL system for monkey2 based on shaders. and based on Cocons base code. I took the framework nd rewrote it to support stuff I needed and then added a 3do model importer (3do is the model format I created for a 3d modeller I wrote called Rameses).
To use the monkey2 version you will need these 3 files:
Ramese3d.monkey2
matrix.monkey2
textural.monkey2
and finally the demo file:
Monkey123456789101112131415161718192021222324252627282930313233343536373839404142434445464748495051525354555657585960616263646566676869707172737475767778798081828384858687888990919293949596979899100101102103104105106107108109110111112113114115116117118119120121122123124125126127128129130131132133134135136137138139140141142143144145146147148149150151152153154155156#import "rameses3d"#import "assets/grid.3do"'the size of our windowConst Size := New Vec2i( 950,720 )'And some nice stuffconst PI:float = 3.14159265359const PIHALF:float = PI * 0.5const SHOW_TEX:float = 1const HIDE_TEX:float = 0const USE_LIGHT:float = 1const NO_LIGHT:float = 0Class MyWindow Extends GLWindow'this is the 3d systemfield my3d:Rameses3d'we need at lest one shaderfield myShader:GLShader'and this is the 3d objectfield r3d_Grid:int'we dont need this, but it is the texture that can be fed into rameses3dfield tex:TextureGLMethod New()'create a windowSuper.New( "My Window", Size.X, Size.Y, WindowFlags.Resizable )'this is a timer. it will 'tick' 60 times a second. calling OnUpdate_timer = New Timer( 60, OnUpdate )'if you want a constant canvas size use this' Layout = "letterbox"'or If you want the canvas to always fill the window use thisLayout = "fill"'get the shaders. we are not using any user defined ones, but we wil need to get a basic oneInitShaders()'next initalize Ramesesmy3d = New Rameses3d( Width, Height )'and set a light. Think of you the observer as position 0, 0, 0.' with x being left/right' y being up/down' and z being in/out z starts at 0, and goes minus away from you, plus towards you' so... 0, 1, -1 is centered, above and into the screenmy3d.SetLight( 0, 1, -2 )'load the texture - we are not using' tex = TextureGL.Load( "asset::ship32x32_font.png", TextureFlagsGL.Dynamic )'now we load the 3d shape from the assetsr3d_Grid = my3d.Load( "asset::grid.3do", myShader )'and finally some opengl'set the clear color of the screen to blackglClearColor(0, 0, 0, 1.0)'cull the face drawing and add depthglEnable(GL_CULL_FACE)glEnable(GL_DEPTH_TEST)Endmethod InitShaders()'first get the basic internal shader from Rameses3dmyShader = New GLShader()End methodMethod OnUpdate()'this 'ticks' at 60 fps'use it For your master updating system_gameTime = Millisecs()'lets update the rotation_objectRotate += 0.005'finally call everything to render'the render is done:OnRenderGL first then standard monkey2 OnRenderRequestRender()End MethodMethod OnRender(canvas:Canvas) OverrideApp.RequestRender()'this will call the opengl renderSuper.OnRender(canvas)canvas.DrawText( "FPS="+App.FPS,Width,0,1,0 )canvas.DrawText("Monkey2 OpenGL", 10, 10)canvas.Color = Color.Bluecanvas.DrawRect( 210, 10, 10, 200 )EndMethod OnRenderGL() Override'clear the screen buffersglClearStencil( 0 )glClear( GL_COLOR_BUFFER_BIT|GL_DEPTH_BUFFER_BIT|GL_STENCIL_BUFFER_BIT )'Drawing area. You're always drawing to the entire window in GL regardless of Layout.glViewport( 0, 0 ,Frame.Width, Frame.Height )'initalize the texture - we are not using' local texint:GLuint = tex.GLTexture' tex.Bind( 0, TextureFilterGL.None )Local scale:float = 1.618'here's the format for the following drawing commands:'method DrawModel( model:int, x:float, y:float, z:float, lightMix:float, textureMix:float, baseColor:Color, scale:float = 1, yrot:float = 0, xrot:float = 0, zrot:float = 0 )my3d.DrawLines( r3d_Grid, 0, -1.5, -3.7, NO_LIGHT, HIDE_TEX, Color.Cyan, scale, 0 )my3d.DrawModel( r3d_Grid, 0, -1, -3.7, NO_LIGHT, HIDE_TEX, Color.Orange, scale*0.5, _objectRotate, _objectRotate )my3d.DrawLines( r3d_Grid, 0, -.5, -3.7, NO_LIGHT, HIDE_TEX, Color.Red, scale*0.25, 0, -_objectRotate )Endprivate'the timer ticks 60 times a second and handles the screen updateField _timer:Timer'global game time derrived from a single call to Millisecs()field _gameTime:intfield _objectRotate:float = 0EndFunction Main()Local cfg := New StringMap<String>cfg["GL_depth_buffer_enabled"] = 1cfg["GL_stencil_buffer_enabled"] = 1New AppInstance( cfg )New MyWindowApp.Run()EndI’ve included all the files in a zip for you. but I thought the main file was better to be seen. the assets folder has lots of .3do files to play with
Attachments:
yep. very simple to use with shader support. I’ll get a demo for you
-
AuthorPosts
