Forum Replies Created
-
AuthorPosts
-
Works now!
From now on, remember to set “camera.View = Self” from the main window for it to work properly.
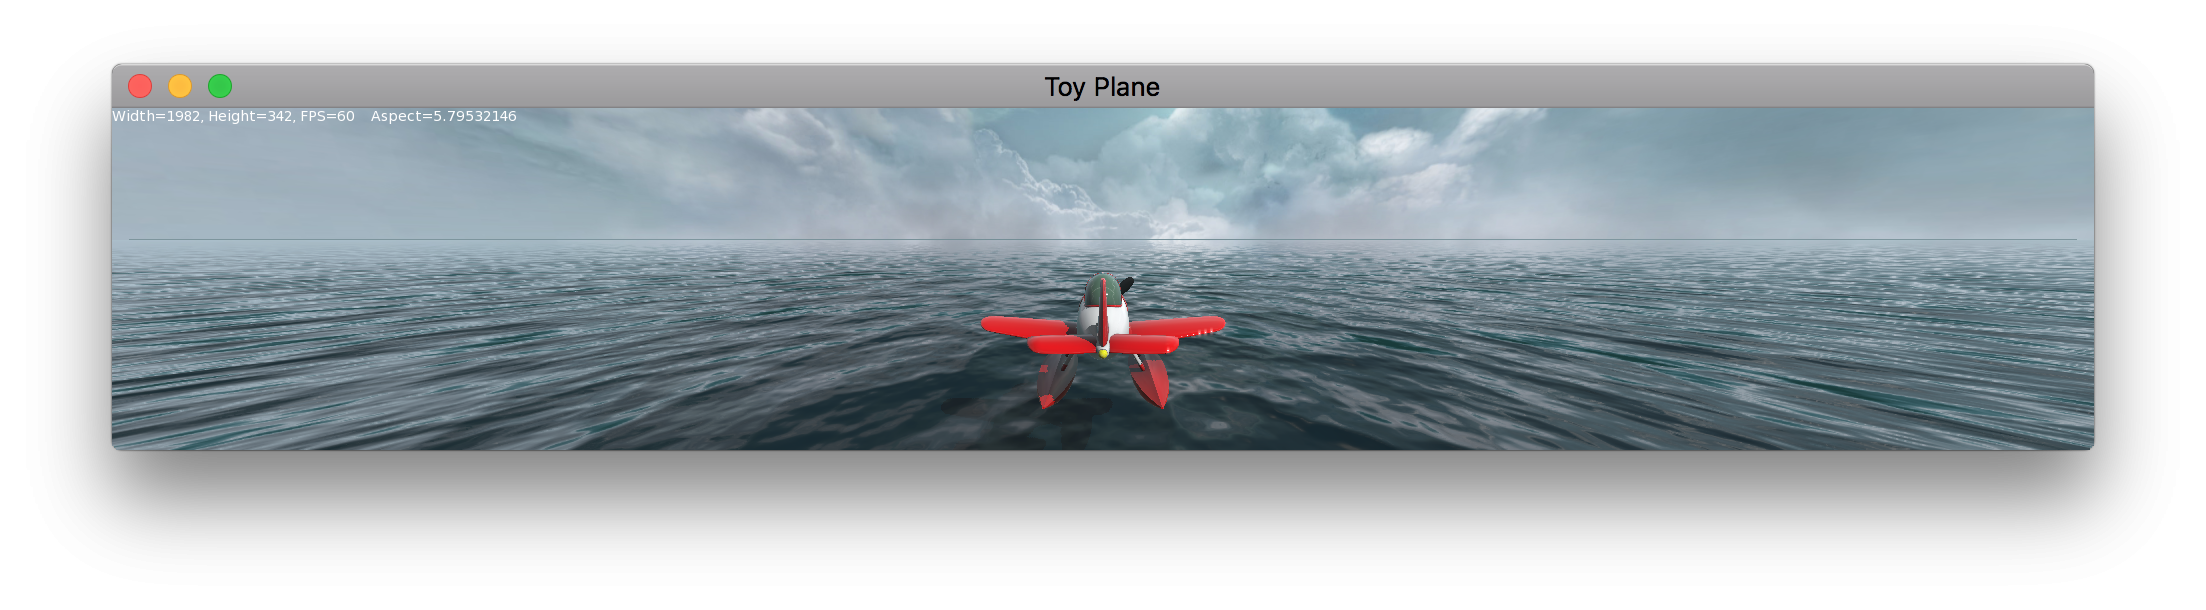
This will render stretched…
Monkey123456789101112131415161718192021222324252627282930313233343536373839404142434445464748495051525354555657585960616263646566676869707172737475767778798081828384858687888990919293949596979899100101102103104105106107108109110111112113114115116117118119120121122123124125126127128129130131132133134135136137138139140141142143144145146147148149150151152153154155156157158159160Namespace plane#Import "<std>"#Import "<mojo>"#Import "<mojo3d>"'#Import "source/PlaneControl"'#Import "textures/"'#Import "assets/"'#Import "render/plane_Oc.png"'#Import "models/plane.glb"Using std..Using mojo..Using mojo3d..Class MyWindow Extends WindowField _res :Vec2iField _scene:SceneField _camera:CameraField _light:Light' Field _fog:FogEffectField _water:ModelField _plane:ModelField _pivot:Model 'Needs to be a Model instead of Entity otherwise the plane isn't rendered!Field _camTarget:EntityField test:ModelMethod New()Super.New( "Toy Plane", 1280, 480, WindowFlags.Resizable | WindowFlags.HighDPI )_res = New Vec2i( Width, Height )Print _resLayout = "letterbox"_scene=Scene.GetCurrent()_scene.SkyTexture=Texture.Load( "asset::miramar-skybox.jpg",TextureFlags.FilterMipmap|TextureFlags.Cubemap )_scene.EnvTexture = _scene.SkyTexture_scene.FogColor = New Color(0.69, 0.78, 0.82, 0.3 )_scene.FogFar = 5000_scene.FogNear = 1'create light_light=New Light_light.Rotate( 45, 45, 0 )_light.CastsShadow = True'create water material' Local waterMaterial:=New WaterMaterial'' waterMaterial.ScaleTextureMatrix( 200,200 )' waterMaterial.ColorFactor=New Color( 0.05, 0.25, 0.3 )' waterMaterial.Roughness=0'' waterMaterial.NormalTextures=New Texture[](' Texture.Load( "asset::water_normal0.png",TextureFlags.WrapST | TextureFlags.FilterMipmap ),' Texture.Load( "asset::water_normal1.png",TextureFlags.WrapST | TextureFlags.FilterMipmap ) )'' waterMaterial.Velocities=New Vec2f[](' New Vec2f( .01,.03 ),' New Vec2f( .02,.05 ) )'create water' _water=Model.CreateBox( New Boxf( -10000,-1,-10000,10000,0,10000 ),1,1,1,waterMaterial )'create bloom' Local _bloom := New BloomEffect( 2 )' _scene.AddPostEffect( _bloom )'create main pivot' _pivot = New Model'create airplane' _plane = Model.LoadBoned( "asset::plane_combined.glb" )' _plane.Animator.Animate( 0 )' _plane.Parent = _pivot' _plane.Position = New Vec3f' Local mat := Cast<PbrMaterial>( _plane.Materi )' Local mat := New PbrMaterial( Color.LightGrey, 0.1, 0.1, True )' Local tex := Texture.Load( "asset::plane_Oc.png", TextureFlags.FilterMipmap )' mat.OcclusionTexture = tex' Print _plane.Materials.Length' Print ( _plane.Material? "true" Else "False" )' _plane.Material = mat'create camera target_camTarget = New Entity( _plane )' _camTarget = Model.CreateSphere( 0.25, 12, 12, New PbrMaterial( Color.Red ) )_camTarget.Parent = _plane_camTarget.Position = New Vec3f( 0, 0, 10 )'create camera_camera=New Camera( _pivot )_camera.Near=.1_camera.Far=10000' _camera.FOV = 60_camera.Move( 0,3,-12 )Print _camera.Aspect'Control component' Local control := _pivot.AddComponent<PlaneControl>()' control.plane = _plane' control.camera = _camera' control.target = _camTarget' _pivot.Position = New Vec3f( 0, 6, 0 )Local ball := Model.CreateSphere( 2, 24, 24, New PbrMaterial( Color.Red, 0.1, 0.25 ) )ball.Move( 0, 4, 0)EndMethod OnRender( canvas:Canvas ) OverrideRequestRender()' _water.Position=New Vec3f( Round(_camera.Position.x/2000)*2000,0,Round(_camera.Position.z/2000)*2000 )_camera.WorldPointAt( _camTarget.Position )' _scene.Update()_camera.Render( canvas )canvas.DrawText( "Width="+Width+", Height="+Height+", FPS="+App.FPS,0,0 )End'Method OnMeasure:Vec2i() OverrideReturn _resEndEndFunction Main()New AppInstanceNew MyWindowApp.Run()EndClass Entity ExtensionMethod WorldPointAt( target:Vec3f,up:Vec3f=New Vec3f( 0,1,0 ) )Local k:=(target-Position).Normalize()Local i:=up.Cross( k ).Normalize()Local j:=k.Cross( i )Basis=New Mat3f( i,j,k )EndEndThe GL shading language itself is not that hard, you can learn most of what you need by reading this and doing the exercises directly in the web page: https://thebookofshaders.com
The difficult part for me was understanding how it connects to Monkey2 and Mojo, and it took a lot of trial an error. That’s why I put together those examples, so that people trying the same would find it easier.
However, those are all 2D. I still haven’t successfully made a 3D material with its own shader, although I haven’t tried recently.
Yay, looks great!

Oh no, Windows only!
Will check later… booting up Windows will take forever since I haven’t used it in months and it will try to update…
Updated!
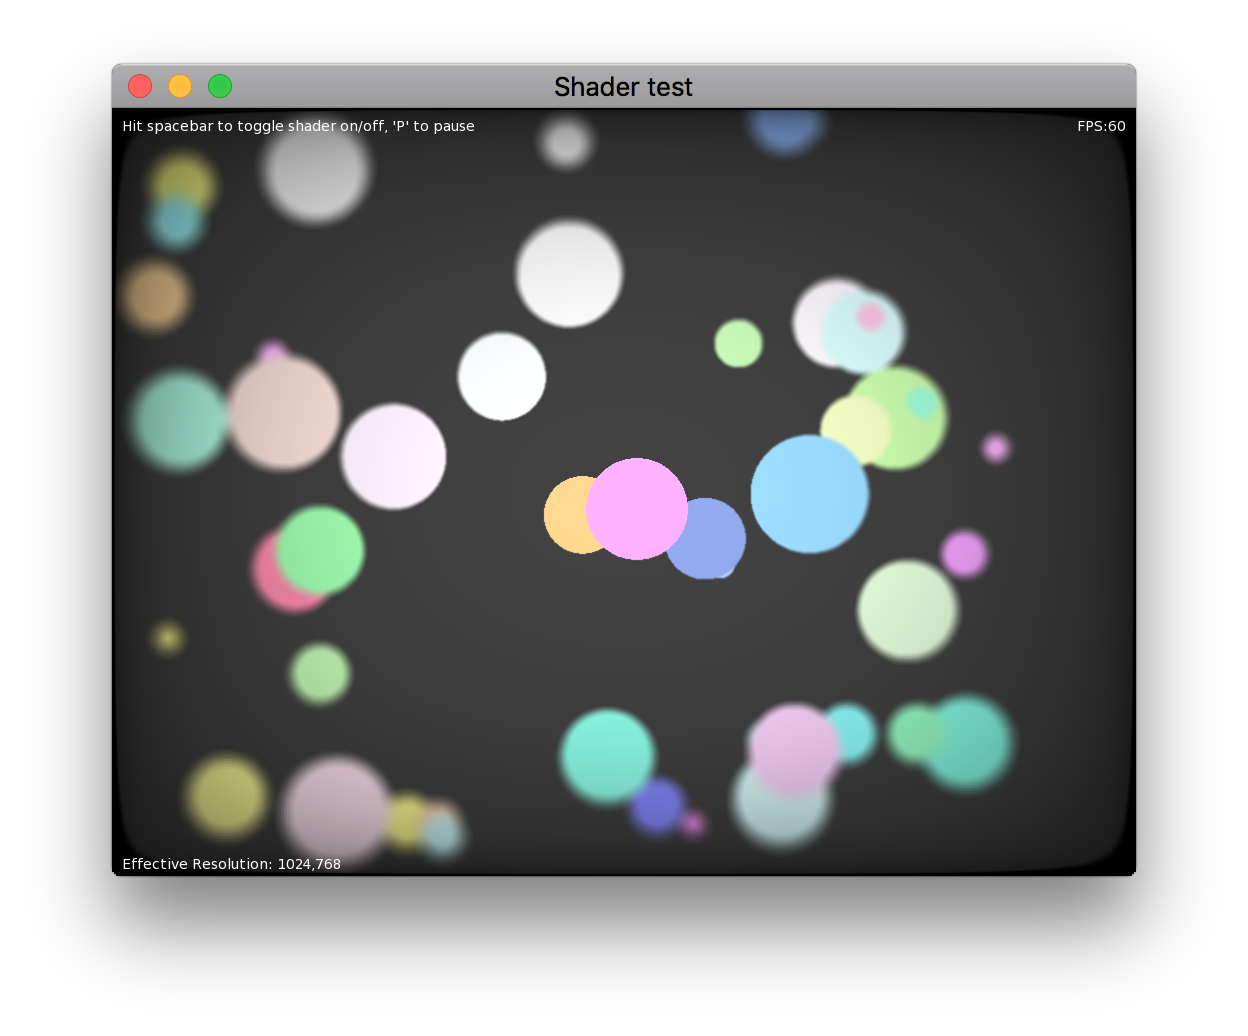
The shader is kinda heavy, though. May not run at 60fps at high resolutions. Dialing the blur samples down speeds things up.https://github.com/DoctorWhoof/Mojo-Shader-Tests
This doesn’t directly answer your question, but may help:
https://github.com/DoctorWhoof/Mojo-Shader-TestsTo do what you want, just create an image canvas with the associated shader, then draw to that canvas, flush it and draw that image into the “main” canvas.
If I have time later I can make a little example.
Cheers!working on lighting/transparency right now
Yay!

Oh, and the best way to “inspect” mojo classes, in my opinion, is from within Ted2Go!
You can go to the “docs” tab, move it to the side dock (yes you can dock it!) and start typing the class you want, with the namespace in it, like “mojo3d.mesh” (capitalization doesn’t seem to matter) and hit enter. Every time you hit enter, a similar result will be shown.
Hitting F1 twice with the cursor in a keyword also works. Not always, though. Typing the namespace seems more consistent.
Cheers.
Actually, you can remove the “If( ( Abs(s0.X) / camera.Viewport.Width ) < 2.0 )And ( ( Abs(s0.Y) / camera.Viewport.Height ) < 2.0 )” lines…
The only reason I have those is because I use coordinates (0,0) at the center of the screen, not at the corner… you can just remove those checks.
Here’s how it looks like when you feed that method all the points in a mesh.
(The render time is usually around a millisecond… I think the screen capture messed it up).
I never got backface culling working, though. Now that I think about it… how would you do that? Hmmm…
Cheers!I started work on a wireframe renderer a while ago, but never finished it.
It used “Camera.ProjectToViewPort( Vec3f )” to work. Haven’t tried it in a while, maybe still works…Monkey123456789101112131415Class Canvas ExtensionMethod Draw3DLine( camera:Camera, v0:Vec3f, v1:Vec3f, offsetX:Float=0, offsetY:Float=0 )Local s0 := camera.ProjectToViewport( v0 )Local s1 := camera.ProjectToViewport( v1 )If( ( Abs(s0.X) / camera.Viewport.Width ) < 2.0 )And ( ( Abs(s0.Y) / camera.Viewport.Height ) < 2.0 )If( ( Abs(s1.X) / camera.Viewport.Width ) < 2.0 )And ( ( Abs(s1.Y) / camera.Viewport.Height ) < 2.0 )If camera.Viewport.Contains( s0 , s1 )DrawLine( s0.X-offsetX, -s0.Y+offsetY, s1.X-offsetX, -s1.Y+offsetY )EndEndEndEndEndI get some occasional stutter when using Intel HD graphics card, and super smooth 60fps when using AMD Radeon card. Both on MacOS, 3 year old laptop. (I use this utility to manually switch cards:https://gfx.io).
I get the point of doing a “stress test”, but I think any kind of 2D game can be designed to work really well in Monkey2 in modern hardware. Either way, I don’t think there’s much garbage collection going on in your test, if any. I wonder if something like SDL is doing anything under the hood that could cause the occasional stutter.
Can you post an example that’s not smooth on Monkey2 on your hardware?
Everything I test in 2D runs super smooth here (and I’m really picky about this sort of stuff) even on a laptop with crappy Intel HD graphics and MacOS High Sierra.
Cheers.
I’d love to be able to simply use GLTF for the entire scene, actually! It seems to allow custom extensions, so I could shove some custom data in there when needed. But writing my own GLTF exporter seems like a lot of work…
Maybe later

P.S. Can you reference other GLTF files from inside a GLTF file? (to reference external models into a scene)
Custom node with PbrMaterial editing in Houdini is on!

Now I need to get those exported to Mojo3D materials…
You can get an unlit look with the PbrShader by:
– Turning off the EnvTexture (i.e. “_scene.EnvColor = Color.Black”, this will create a black texture for the environment )
– Setting the ambient light to Color.White (“_scene.AmbientLight = Color.White”)
– Making sure the material has 0 Metalness and 1.0 roughness, if you want no specular hilights.
– Don’t add any lights.
This will look like an unlit shader, but it won’t render as fast as one!

-
AuthorPosts

